

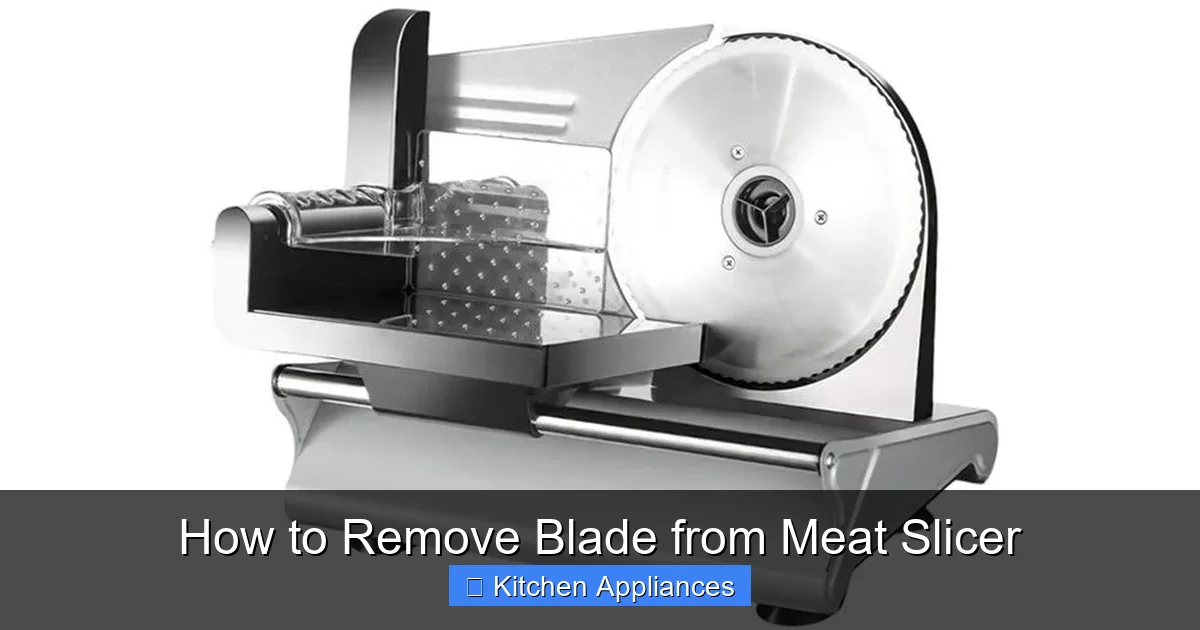
Safely removing the blade from your meat slicer is crucial for effective cleaning and maintenance. Always prioritize safety by unplugging the unit and consulting your manual. Follow these steps carefully to ensure a smooth and secure blade removal process, keeping your slicer in top condition.
Are you looking to get the most out of your meat slicer? Whether you’re a home chef who loves thinly sliced deli meats for sandwiches, a hunter preparing game, or just someone who enjoys perfectly uniform slices of cheese, a meat slicer is a fantastic kitchen appliance. But like any tool with a sharp component, it requires regular cleaning and maintenance to keep it running smoothly and safely. A big part of this is knowing how to remove the blade.
This might sound a little intimidating at first. After all, we’re talking about a very sharp blade! But with the right approach and a focus on safety, removing the blade from your meat slicer is a straightforward process. It’s essential for thorough cleaning, sharpening, or even replacing the blade when it eventually dulls. This guide will walk you through each step, making sure you can confidently tackle this task.
Let’s dive into how to safely and effectively remove the blade from your meat slicer, ensuring its longevity and your safety in the kitchen.
Key Takeaways
- Unplug First: Always disconnect the meat slicer from the power source before attempting any blade removal. This is the most critical safety step.
- Consult Your Manual: Every meat slicer model is slightly different. Your owner’s manual is the best resource for specific instructions on blade removal for your particular unit.
- Secure the Blade: Most slicers have a mechanism to lock the blade in place, preventing accidental rotation during removal. Learn how to engage this lock.
- Use Proper Tools: Have the correct screwdriver or wrench (often provided with the slicer) ready to loosen the blade’s retaining nut or screw.
- Handle with Care: Meat slicer blades are extremely sharp. Wear cut-resistant gloves and handle the blade with extreme caution to avoid injury.
- Reassembly is Key: Ensure the blade is reattached securely and correctly after cleaning. Overtightening or undertightening can be dangerous.
Quick Answers to Common Questions
How often should I remove the blade from my meat slicer?
You should remove the blade for cleaning whenever it gets visibly dirty, or at least once a month with regular use. For sharpening or replacement, do so as needed based on performance.
Can I use any screwdriver to remove the blade?
No, you must use the specific type of screwdriver or wrench recommended in your meat slicer’s manual. Using the wrong tool can strip the screw head or damage the blade.
What if I don’t have cut-resistant gloves?
It is highly recommended to use cut-resistant gloves. If you absolutely cannot find them, use a very thick towel or cloth to handle the blade, but understand this offers less protection.
Is it okay to put the blade in the dishwasher?
Generally, it’s not recommended. The harsh detergents and high heat in a dishwasher can dull the blade, damage its coating, and potentially cause rust. Hand washing with warm, soapy water is best.
What should I do if I lose the retaining screw or nut?
Contact the manufacturer of your meat slicer immediately. They can provide you with the correct replacement part. Do not use a generic screw or nut as it may not fit properly and could be a safety hazard.
📑 Table of Contents
Understanding Your Meat Slicer Blade
Before we get to the actual removal, it’s important to understand the blade itself. Meat slicer blades are typically made of high-carbon stainless steel, designed for durability and sharpness. They are often serrated, which helps them cut through tough meats and other ingredients with ease. The blade is usually secured to the slicer’s motor shaft by a central screw or a nut. This mechanism is designed to hold the blade firmly in place during operation, but it’s also engineered for removal when needed.
The Importance of Blade Removal
Why go through the trouble of removing the blade? There are several key reasons:
- Deep Cleaning: While you can clean the slicer with the blade in place, removing it allows for a much more thorough clean. You can get into every nook and cranny, ensuring no food particles or bacteria are left behind. This is especially important for hygiene.
- Sharpening: For the sharpest cuts, blades eventually need sharpening. Removing the blade makes it much easier and safer to use a sharpening stone or a professional sharpening service.
- Replacement: Blades do wear out over time. If your blade is damaged, severely dulled, or you simply want a spare, you’ll need to remove the old one to install a new one.
- Inspection: Removing the blade allows you to inspect it for any nicks, bends, or other damage that might affect its performance or safety.
Safety First: Essential Precautions
This cannot be stressed enough: safety is paramount when dealing with a meat slicer blade. These blades are incredibly sharp, and a moment of carelessness can lead to serious injury.
Always Unplug the Slicer
This is the golden rule. Before you even think about touching the blade or any part of the slicer that’s near it, **unplug the unit from the electrical outlet**. Do not rely on the power switch alone. A misplaced touch could accidentally turn it on if it’s still plugged in. Make sure the cord is completely disconnected.
Wear Protective Gear
Invest in a pair of cut-resistant gloves. These are specifically designed to protect your hands from sharp objects. You can find them at hardware stores or online. Wearing these gloves significantly reduces the risk of accidental cuts.
Read Your Manual
Every meat slicer is a bit different. Your owner’s manual is your best friend here. It will have specific instructions for your model, including how to engage any blade locking mechanisms and the exact type of tool needed to remove the blade. If you can’t find your manual, most manufacturers have them available for download on their websites.
Clear Your Workspace
Ensure you have a clean, well-lit, and stable surface to work on. Remove any clutter that could get in the way or cause you to stumble. Having everything you need – the slicer, the manual, the correct tools, and your gloves – within easy reach will make the process smoother and safer.
Step-by-Step Guide to Removing the Blade
Now that we’ve covered the safety essentials, let’s get to the actual process of removing the blade. Remember to refer to your slicer’s manual for model-specific details.
Step 1: Prepare the Slicer
First, ensure the slicer is unplugged and clean. Wipe down the exterior and the food carriage. Remove any large food debris from around the blade area. This will make it easier to access the blade and prevent contamination during the process.
Step 2: Engage the Blade Lock (If Applicable)
Many modern meat slicers have a safety feature that locks the blade in place. This prevents it from spinning while you’re working on it. Look for a small knob, lever, or button near the blade assembly. Your manual will show you exactly where it is and how to activate it. It might involve turning a knob until it clicks or pushing a button.
Step 3: Loosen the Blade Retaining Mechanism
This is where you’ll need a tool. Most slicers use a central screw or a nut to hold the blade. Your manual should tell you whether you need a Phillips head screwdriver, a flathead screwdriver, or a specific wrench. Some slicers even come with the necessary tool.
Important Tip: Pay attention to the direction you need to turn the screw or nut. Most are standard threading, meaning you turn them counter-clockwise to loosen (lefty-loosey). However, always double-check your manual to be sure.
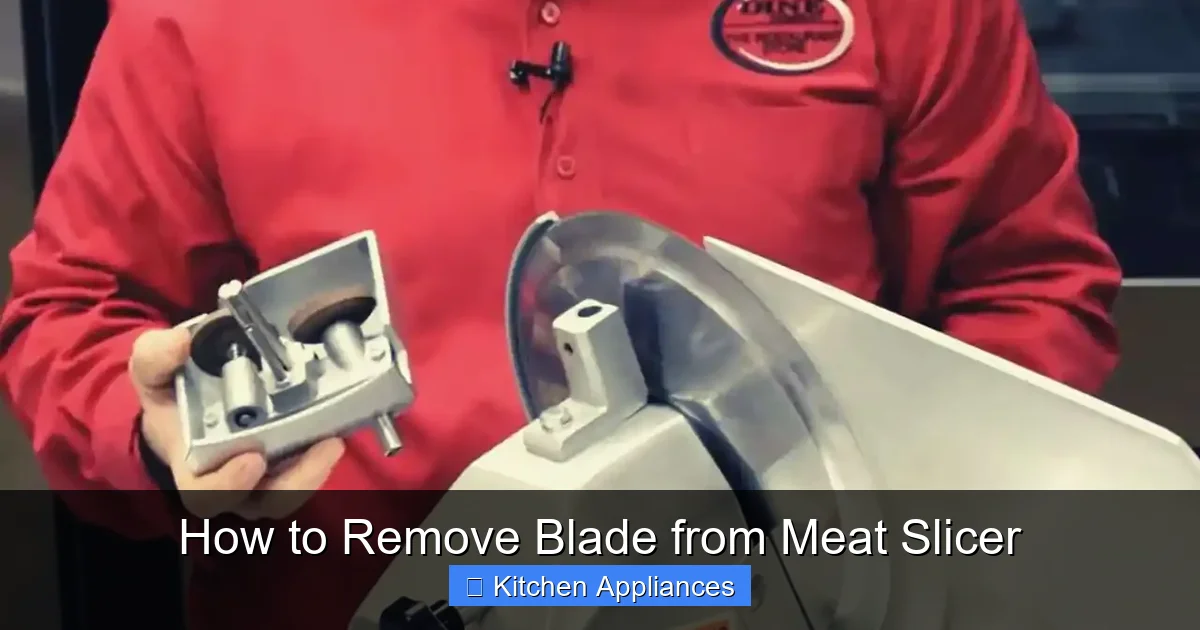
Visual guide about How to Remove Blade from Meat Slicer
Image source: bestreviewsforkitchen.com
Carefully insert your screwdriver or wrench into the center of the blade. Apply steady pressure and turn it counter-clockwise. You might need to hold the blade steady with your gloved hand (without touching the sharp edge!) or use a cloth to prevent it from turning freely as you loosen the fastener. If your slicer has a blade lock, this step should be much easier.
Step 4: Remove the Retaining Screw/Nut
Once the screw or nut is loose enough, you can usually remove it by hand. Keep it in a safe place, like a small bowl or a designated compartment on the slicer, so you don’t lose it.
Step 5: Carefully Remove the Blade
With the retaining mechanism removed, the blade should now be free. This is the most critical moment for caution.
- Gently grasp the blade by its center hub or the non-sharp backing edge. Never touch the cutting edge.
- Lift the blade straight off the motor shaft. Avoid wiggling it excessively, as this can put stress on the motor shaft.
- Place the blade immediately into a protective sleeve, a thick cloth, or a designated blade storage container.
Pro Tip: If the blade seems stuck, don’t force it. There might be a small amount of dried food residue or a slight misalignment. Try gently wiggling it while applying a slight upward pull. If it’s still stuck, re-consult your manual or consider contacting customer support.
Cleaning and Maintenance After Blade Removal
With the blade safely removed, you can now give your meat slicer a thorough cleaning.
Cleaning the Blade
Use warm, soapy water and a soft cloth or sponge to clean the blade. For stubborn residue, you can use a non-abrasive scrubber. Rinse the blade thoroughly and dry it completely with a clean towel. Ensure it is bone dry before reassembly to prevent rust. If you plan to sharpen it, this is the time.
Cleaning the Slicer Body
Use a damp cloth with mild detergent to wipe down the food carriage, the blade guard, and the rest of the slicer body. Pay close attention to areas around the blade mount. Dry all parts thoroughly.
This is also a good time to clean other kitchen appliances. For example, if you’ve just finished a big baking project, you might be wondering how to clean a stand mixer. Regular cleaning of all your kitchen tools ensures they last longer and work better.
Reassembling the Meat Slicer Blade
Putting the blade back on is just as important as taking it off, and safety is still key.
Step 1: Place the Blade Back on the Shaft
Carefully pick up the clean, dry blade by its hub or non-sharp edge. Align the center hole of the blade with the motor shaft. Gently place the blade onto the shaft. Ensure it sits flush and is properly seated.
Step 2: Reattach the Retaining Mechanism
Place the retaining screw or nut back onto the shaft. Tighten it by hand as much as possible.
Step 3: Tighten the Screw/Nut
Using the appropriate tool, tighten the screw or nut clockwise (righty-tighty).
Crucial Point: You need to tighten it securely, but do not overtighten. Overtightening can damage the blade, the shaft, or the retaining mechanism. It should be snug and firm, preventing any wobble.
Step 4: Release the Blade Lock (If Applicable)
Once the blade is securely tightened, disengage the blade lock mechanism according to your manual’s instructions.
Step 5: Final Check
Give the blade a gentle (with gloves on!) spin with your hand. It should rotate smoothly without any clicking or grinding noises. Ensure there’s no wobble. Double-check that the retaining screw/nut is tight.
Troubleshooting Common Issues
Sometimes, things don’t go perfectly smoothly. Here are a couple of common issues and how to address them:
Blade Won’t Come Off
If the blade seems stuck, ensure you’ve fully loosened the retaining screw/nut and that the blade lock is properly disengaged. Sometimes, a small amount of food residue can act like glue. Try applying a small amount of food-safe lubricant around the shaft and letting it sit for a few minutes. If it’s still stuck, avoid excessive force, which could damage the motor shaft. Contact the manufacturer’s support.
Blade Wobbles After Reassembly
This usually means the retaining screw/nut isn’t tight enough. Unplug the slicer again and tighten it further. Ensure the blade is seated correctly on the shaft before tightening. If it continues to wobble, there might be an issue with the shaft or the blade itself.
Conclusion
Removing the blade from your meat slicer is an essential skill for any owner who wants to maintain their appliance effectively and hygienically. By prioritizing safety, consulting your manual, and following these steps carefully, you can confidently remove, clean, and reassemble your slicer’s blade. Remember, a well-maintained slicer means better results and safer food preparation for you and your family. Happy slicing!
Frequently Asked Questions
How do I know if my meat slicer blade needs to be removed?
You should remove the blade if you notice food particles that cannot be cleaned otherwise, if the blade seems dull and is no longer slicing efficiently, or if you wish to sharpen or replace it. Regular cleaning will also necessitate its removal.
Can I remove the blade without unplugging the slicer?
Absolutely not. It is critically important to unplug the meat slicer from the power outlet before attempting to remove the blade. Failure to do so is extremely dangerous and can lead to severe injury.
What is the purpose of the blade lock on a meat slicer?
The blade lock is a safety feature designed to keep the blade stationary while you are cleaning or removing it. This prevents accidental rotation, significantly reducing the risk of cuts.
Are all meat slicer blades removable?
Yes, virtually all meat slicer blades are designed to be removable for cleaning, sharpening, and maintenance. The method of removal might vary slightly between models, but the principle remains the same.
How do I store the meat slicer blade safely after removal?
Once removed and cleaned, the blade should be stored in a protective sleeve, a thick cloth, or a designated blade storage container to prevent accidental cuts and protect the blade itself from damage.
Is it normal for the blade to be difficult to remove?
Sometimes, dried food residue can make a blade slightly resistant. However, if it’s extremely difficult to remove, ensure you have followed all steps correctly, that the retaining mechanism is fully loosened, and that the blade lock is disengaged. If it persists, consult your manual or the manufacturer.
