

Properly cleaning your meat slicer is crucial for hygiene and longevity. Follow these steps to disassemble, clean, sanitize, and reassemble your slicer effectively. Regular cleaning prevents bacteria buildup and ensures delicious, safe results every time.
Owning a meat slicer can be a game-changer for any kitchen, whether you’re a home cook who loves deli-style sandwiches or a small business owner preparing charcuterie boards. It allows you to achieve those perfect, paper-thin slices of roast beef, turkey, or even cheese. But with great slicing power comes great responsibility, and that responsibility includes keeping your slicer impeccably clean. A dirty meat slicer isn’t just unappealing; it can be a breeding ground for harmful bacteria, compromising food safety and potentially ruining the taste of your food.
Think about it: raw meat juices, cheese residue, and tiny food particles can get trapped in all the nooks and crannies of your slicer. If not cleaned properly and regularly, these remnants can harbor bacteria like Salmonella, E. coli, and Listeria. This is why learning how to properly clean a meat slicer is not optional—it’s essential. It ensures your food is safe to eat, extends the life of your appliance, and maintains the quality of your sliced products.
This guide will walk you through the entire process, from unplugging your machine to safely reassembling it. We’ll cover everything you need to know to keep your meat slicer in top condition, ensuring it performs beautifully and safely for years to come. So, grab your cleaning supplies, and let’s get your slicer sparkling clean!
Key Takeaways
- Safety First: Always unplug the meat slicer before cleaning to prevent accidental startup.
- Disassembly is Key: Carefully remove the blade, food pusher, and other removable parts for thorough cleaning.
- Gentle Cleaning Agents: Use warm, soapy water and a soft cloth for most parts. Avoid harsh chemicals that can damage the slicer.
- Sanitization is Crucial: After cleaning, sanitize all food-contact surfaces with a food-grade sanitizer to kill bacteria.
- Thorough Drying: Ensure all parts are completely dry before reassembly to prevent rust and mold.
- Blade Care: Handle the sharp blade with extreme caution. Clean it separately and dry it immediately.
- Regular Maintenance: Establish a cleaning schedule based on usage to maintain optimal performance and hygiene.
Quick Answers to Common Questions
What is the most important safety step when cleaning a meat slicer?
The most important safety step is to always unplug the meat slicer from the power outlet before you begin any cleaning. This prevents the blade from accidentally spinning and causing injury.
Can I use harsh chemicals to clean my meat slicer?
No, it’s generally not recommended to use harsh chemicals like abrasive cleaners or strong solvents. These can damage the slicer’s surfaces, coatings, and potentially leave harmful residues. Stick to warm, soapy water and approved food-grade sanitizers.
How often should I clean my meat slicer?
If you use your meat slicer regularly, especially for raw meats, a thorough cleaning and sanitizing should be done daily. For less frequent use, a deep clean after every few uses or weekly is a good practice. Always consult your manufacturer’s manual for specific recommendations.
Is it safe to immerse the meat slicer body in water?
No, you should never immerse the main body of the meat slicer in water. This can damage the electrical components and motor, leading to malfunction or safety hazards.
What should I do if my meat slicer blade is rusty?
If your meat slicer blade has rust spots, it’s usually due to improper drying or storage. You can try to remove light rust with a fine-grit sandpaper or a rust remover specifically designed for blades, but be extremely careful. Ensure it’s thoroughly cleaned and sanitized afterward. For severe rust, the blade may need to be replaced.
📑 Table of Contents
- Safety First: Preparing Your Meat Slicer for Cleaning
- Disassembling Your Meat Slicer for a Deep Clean
- The Cleaning Process: Washing Away Food Residue
- Sanitizing for Food Safety
- Drying and Reassembly: Bringing Your Slicer Back to Life
- Maintenance and Frequency: Keeping Your Slicer in Top Shape
- Conclusion
Safety First: Preparing Your Meat Slicer for Cleaning
Before you even think about reaching for a sponge, the most critical step is to ensure your meat slicer is safe to handle. This is non-negotiable.
Unplugging the Appliance
The absolute first thing you must do is unplug the meat slicer from the power outlet. Most slicers have a cord that can be easily disconnected. Do not rely on just turning the power switch off. Always physically remove the plug from the wall socket. This prevents the blade from accidentally spinning while you’re cleaning, which could lead to serious injury. Imagine trying to clean a sharp, spinning blade – it’s a recipe for disaster!
Cooling Down the Blade
If you’ve just finished using your slicer, the blade and surrounding metal parts might be warm or even hot. Allow the slicer to cool down completely before you begin cleaning. This not only prevents burns but also makes the metal less likely to warp or be damaged by sudden temperature changes from cleaning solutions. Patience here is key for both safety and appliance longevity.
Disassembling Your Meat Slicer for a Deep Clean

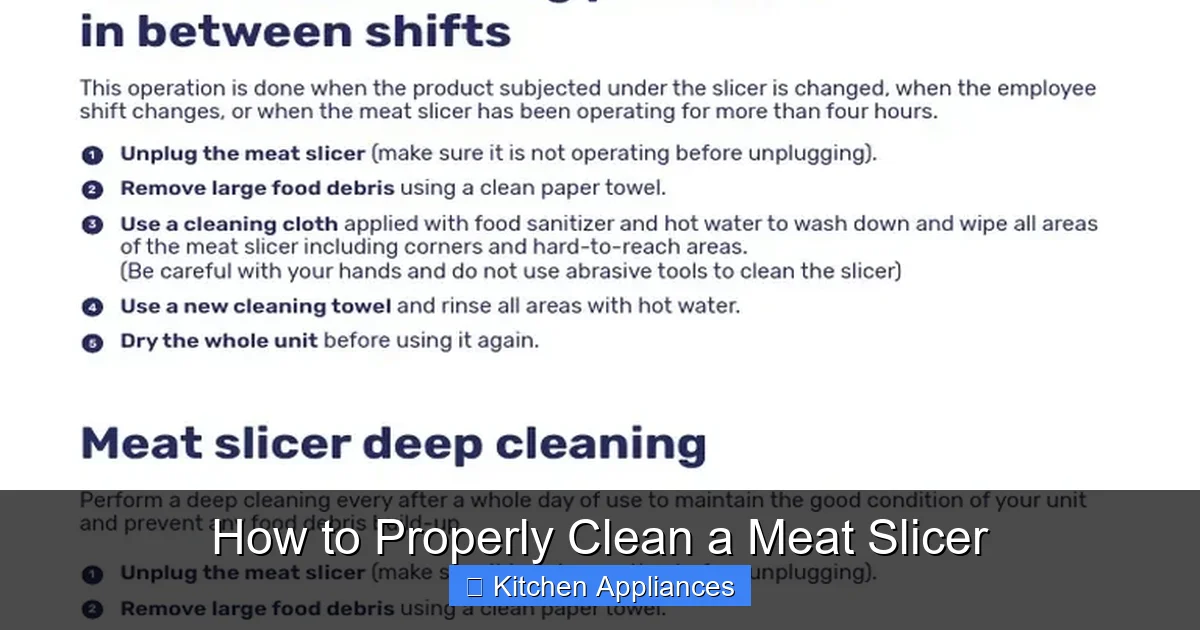
Visual guide about How to Properly Clean a Meat Slicer
Image source: chinaequipmentsupplier.com
Once you’ve confirmed your slicer is unplugged and cool, it’s time to take it apart. This is where you’ll gain access to all those hidden spots where food debris likes to hide.
Removing the Blade Guard
Most meat slicers have a blade guard that covers the cutting blade for safety. This guard is usually attached with a screw or a locking mechanism. Carefully loosen this screw or disengage the lock to remove the blade guard. Keep the guard and its hardware in a safe place so you don’t lose them.
Removing the Blade
This is the most delicate part of the disassembly process. Always handle the blade with extreme caution. Many slicers come with a blade removal tool or have specific instructions on how to remove it safely. If you don’t have a tool, you might need gloves and a firm grip. Some blades twist off, while others are held in place with a central screw. Consult your slicer’s manual if you’re unsure. Once removed, place the blade in a safe spot, away from children and pets, and preferably in a container that prevents it from rolling around.
Removing Other Removable Parts
Take off any other parts that can be detached, such as the food pusher (the part that holds the meat against the blade), the food tray, and any other guards or plates. These parts will need to be cleaned individually. Lay them out so you can easily access them for washing.
The Cleaning Process: Washing Away Food Residue
With your slicer disassembled, it’s time to get down to the actual washing. The goal here is to remove all visible food debris and grease.
Washing Removable Parts
For the blade, food pusher, food tray, and blade guard, the best approach is usually to wash them by hand in a sink filled with warm, soapy water. Use a soft sponge or cloth. For the blade, use a cloth to wipe away from the sharp edge. Avoid abrasive scrubbers or steel wool, as these can scratch the surfaces and potentially damage the blade’s coating.
Cleaning the Slicer Body
The main body of the slicer needs attention too. Use a damp cloth dipped in warm, soapy water to wipe down all surfaces, including the carriage, the base, and any areas around the motor housing. Pay close attention to crevices and areas where food particles might have accumulated. A soft brush, like an old toothbrush, can be very useful for getting into tight spots.
Dealing with Stubborn Residue
If you encounter stubborn, dried-on food residue, you can soak the removable parts in warm, soapy water for a short period. For the main body, you might need to use a mild degreaser specifically designed for kitchen appliances, but always follow the manufacturer’s instructions and ensure it’s safe for food-contact surfaces. Never immerse the main body of the slicer in water, as this can damage the electrical components.
Sanitizing for Food Safety
Washing removes visible grime, but sanitizing kills the invisible bacteria that can make you sick. This step is absolutely crucial for any appliance that comes into contact with food.
Choosing a Sanitizer
There are several options for sanitizing your meat slicer:
* Commercial Food-Grade Sanitizers: These are readily available at restaurant supply stores or online. They are formulated to kill bacteria effectively and are safe for food-contact surfaces. Follow the dilution and contact time instructions on the product label carefully.
* Bleach Solution: A common and effective sanitizer can be made by mixing 1 tablespoon of unscented household bleach with 1 gallon of water. Ensure the bleach is unscented, as fragrances can leave unwanted odors.
* Vinegar Solution: While less potent than bleach or commercial sanitizers, a solution of equal parts white vinegar and water can offer some sanitizing properties and is a more natural option. However, it may not be sufficient for heavy-duty sanitization.
Applying the Sanitizer
After washing and rinsing all parts thoroughly, apply your chosen sanitizer. For food-contact surfaces, use a clean cloth or spray bottle to apply the sanitizer. Ensure all surfaces are evenly coated.
Contact Time and Rinsing
The sanitizer needs to remain in contact with the surfaces for a specific amount of time to be effective. This contact time is usually specified on the product label. For bleach solutions, it’s typically a few minutes. After the recommended contact time, you usually need to rinse the surfaces with clean water. Some sanitizers are “no-rinse,” meaning they are safe to air dry without rinsing. Always check the product instructions.
Drying and Reassembly: Bringing Your Slicer Back to Life
The final steps involve ensuring everything is dry and then putting your slicer back together correctly. Proper drying is essential to prevent rust and mold.
Thorough Drying
Use clean, dry towels to thoroughly dry all parts of the meat slicer, including the blade, blade guard, food pusher, and the main body. Pay special attention to crevices and joints where moisture can linger. You can also let parts air dry completely on a clean drying rack before reassembly. Ensuring the blade is completely dry is critical to prevent rust.
Reassembling the Slicer
Carefully reassemble your meat slicer in the reverse order of disassembly.
* Reattach the blade, ensuring it’s securely fastened. Remember to handle it with extreme care.
* Put the blade guard back in place and secure it.
* Reattach the food pusher and any other guards or plates.
Make sure all parts click or lock securely into place. Give the slicer a gentle shake to ensure everything is stable.
Final Wipe-Down
Once fully reassembled, give the exterior of the slicer a final wipe-down with a clean, dry cloth. This removes any remaining dust or fingerprints and leaves your appliance looking pristine.
Maintenance and Frequency: Keeping Your Slicer in Top Shape
How often should you clean your meat slicer? The answer depends on how you use it.
Daily Cleaning
If you use your meat slicer regularly, especially for raw meats, a thorough cleaning and sanitizing at the end of each day is essential. This prevents bacteria from multiplying overnight and ensures your slicer is ready for use the next day.
Deep Cleaning Schedule
Beyond daily cleaning, a more thorough deep clean—involving disassembly and sanitization—should be performed regularly. For home use, once a week or every few uses might be sufficient. For commercial use, daily deep cleaning is often mandatory. Always refer to your manufacturer’s manual for specific recommendations.
Storage
When not in use, store your meat slicer in a clean, dry place. Consider covering it with a food-grade cover or plastic wrap to protect it from dust and airborne contaminants.
Cleaning a meat slicer might seem like a chore, but it’s a vital part of responsible food preparation. By following these steps, you ensure your food is safe, your slicer performs at its best, and you can continue to enjoy perfectly sliced meats and cheeses for a long time. Just like keeping other kitchen appliances in good working order, such as knowing how to clean a stand mixer, consistent maintenance makes a big difference.
Conclusion
Properly cleaning your meat slicer is a fundamental practice for anyone who uses one. It’s a straightforward process that, when done correctly and regularly, safeguards your health, preserves the quality of your food, and extends the life of your valuable kitchen appliance. Remember to always prioritize safety by unplugging the unit and handling the blade with the utmost care. By incorporating a consistent cleaning and sanitizing routine into your kitchen habits, you ensure that every slice you make is not only perfect but also perfectly safe. Happy slicing, and happy cleaning!
Frequently Asked Questions
How do I safely remove the blade from my meat slicer?
Always ensure the slicer is unplugged and the blade is cool. Consult your manual for specific instructions, as blades can be secured with screws or twist-off mechanisms. Some slicers come with a blade removal tool. Handle the blade with extreme caution, keeping fingers away from the sharp edge.
What kind of soap should I use for cleaning?
Use a mild dish soap or detergent mixed with warm water. Avoid abrasive soaps or scouring pads, as they can scratch the surfaces of your slicer, especially the blade and platter.
Can I use my dishwasher to clean meat slicer parts?
It’s generally not recommended. While some removable parts might be dishwasher-safe, the high heat and harsh detergents can dull the blade, damage coatings, and potentially warp plastic components over time. Hand washing with warm, soapy water is the safest and most effective method.
How do I sanitize my meat slicer effectively?
After washing, apply a food-grade sanitizer according to the product’s instructions. Common options include diluted bleach solutions or commercial food-grade sanitizers. Ensure the sanitizer makes contact with all food-contact surfaces for the recommended duration before rinsing (if required).
What should I do if I can’t remove a part of my meat slicer?
If you’re struggling to remove a part, especially the blade, do not force it. Refer to your meat slicer’s owner’s manual for specific instructions. Forcing parts can lead to damage or injury. If you’re still unsure, contact the manufacturer or a qualified service technician.
How can I prevent rust on my meat slicer blade?
The best way to prevent rust is to ensure the blade is completely dry after washing and sanitizing. You can also apply a very thin coat of food-grade mineral oil to the blade before storing it. This acts as a protective barrier against moisture.
