

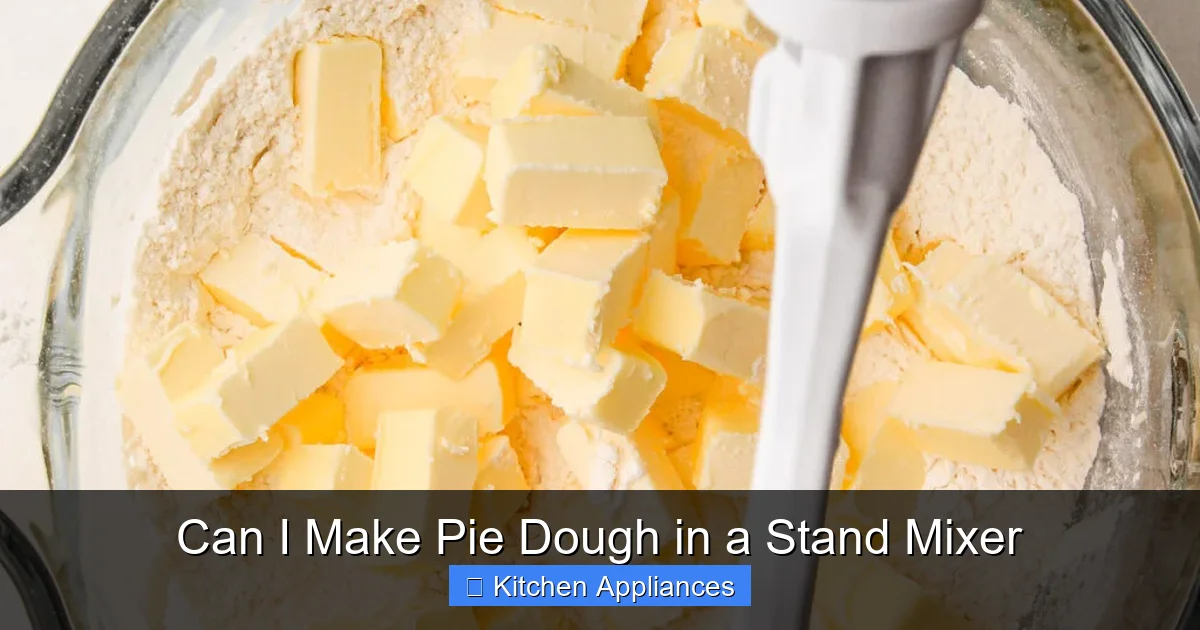
You absolutely can make pie dough in a stand mixer—and it’s easier than you think. With the right attachment and technique, your stand mixer can deliver flaky, tender crusts without overworking the dough. This guide covers everything from setup to storage, so you can bake with confidence.
Key Takeaways
- Yes, a stand mixer works great for pie dough: It saves time and ensures even mixing, especially for beginners.
- Use the paddle attachment, not the whisk: The paddle gently combines ingredients without overdeveloping gluten.
- Keep ingredients cold: Cold butter and ice water are essential for a flaky texture.
- Mix just until combined: Overmixing leads to tough crusts—stop as soon as the dough forms.
- Chill the dough before rolling: Resting the dough relaxes the gluten and prevents shrinkage during baking.
- Adjust mixing time based on recipe: Some doughs need more blending; others require a light touch.
- Clean your mixer promptly: Dried dough can clog the paddle and affect future mixes.
📑 Table of Contents
Can I Make Pie Dough in a Stand Mixer?
Short answer: Yes—and it might just become your new favorite way to make pie dough. If you’ve ever stood over a bowl, cutting butter into flour with a pastry cutter or two forks, you know how time-consuming and messy it can be. A stand mixer changes the game. It’s faster, more consistent, and frees up your hands for other tasks. Whether you’re making a classic apple pie, a savory quiche, or a buttery pecan tart, using your stand mixer can help you achieve that perfect flaky crust with less effort.
Many bakers worry that machines will overwork the dough or make it tough. But with the right technique, your stand mixer becomes a reliable tool for tender, flaky results. The key is knowing how to use it properly—choosing the right attachment, controlling mixing time, and keeping ingredients cold. In this guide, we’ll walk you through everything you need to know to make perfect pie dough in your stand mixer, from setup to storage.
Why Use a Stand Mixer for Pie Dough?
Making pie dough by hand has its charm, but it’s not always practical—especially if you’re baking often or have limited time. A stand mixer offers several advantages that make it a smart choice for both beginner and experienced bakers.
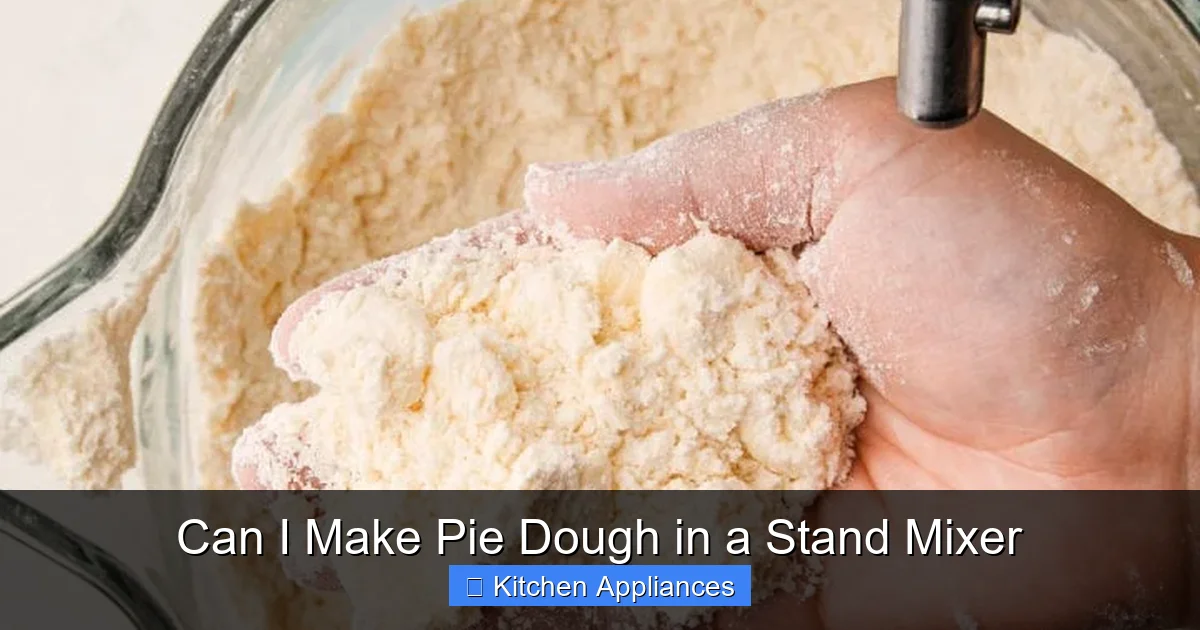
Visual guide about Can I Make Pie Dough in a Stand Mixer
Image source: everydaypie.com
Speed and Efficiency
Cutting butter into flour by hand can take 5–10 minutes, depending on your technique. With a stand mixer, that time drops to under 2 minutes. The paddle attachment quickly breaks down cold butter into pea-sized pieces, evenly coating them in flour. This speed is especially helpful when you’re making multiple pies or working in a warm kitchen.
Consistent Results
Hand mixing can lead to uneven butter distribution, which affects texture. Some parts of the dough may be too buttery, while others are too dry. A stand mixer ensures uniform mixing, giving you a more predictable outcome every time. This consistency is crucial for achieving that delicate balance between flakiness and structure.
Less Physical Effort
If you have arthritis, hand fatigue, or simply prefer to multitask in the kitchen, a stand mixer is a game-changer. You can start the mixer and move on to preparing your filling, washing fruit, or setting the table. It’s also easier to clean up—just remove the bowl and paddle, rather than scrubbing sticky dough off your hands and countertops.
Choosing the Right Attachment
Not all stand mixer attachments are created equal when it comes to pie dough. Using the wrong one can lead to overmixing or uneven texture.
The Paddle Attachment: Your Best Friend
The flat beater, or paddle attachment, is ideal for pie dough. It gently folds and presses ingredients together without whipping air into the mixture. This helps maintain the cold, crumbly texture needed for flakiness. Avoid the whisk attachment—it’s designed for aerating and will incorporate too much air, leading to a tougher crust.
When to Use the Dough Hook (and When Not To)
The dough hook is great for bread dough but not recommended for pie dough. It’s designed to knead and develop gluten, which is the opposite of what you want in a tender pie crust. Using it can result in a chewy, bread-like texture. Stick with the paddle for best results.
Cleaning and Maintenance Tips
After mixing, remove any dough stuck to the paddle with a silicone spatula. Wash the attachment and bowl with warm, soapy water—avoid abrasive scrubbers that could damage the finish. For stubborn bits, soak the paddle in warm water for a few minutes before washing. Regular cleaning ensures your mixer stays in top condition and prevents cross-contamination between sweet and savory recipes.
Step-by-Step Guide to Making Pie Dough in a Stand Mixer
Now that you know why and how to use your stand mixer, let’s walk through a simple, reliable method for making classic pie dough.
Ingredients You’ll Need
- 2 ½ cups (300g) all-purpose flour
- 1 teaspoon salt
- 1 tablespoon sugar (optional, for sweet pies)
- 1 cup (2 sticks or 226g) cold unsalted butter, cut into ½-inch cubes
- 6–8 tablespoons ice water
Step 1: Combine Dry Ingredients
Add the flour, salt, and sugar (if using) to the stand mixer bowl. Use the paddle attachment and mix on low speed for about 10 seconds to combine. This ensures even distribution and prevents pockets of salt or sugar.
Step 2: Add Cold Butter
Add the cold butter cubes to the bowl. Mix on low speed for 1–2 minutes, or until the butter is broken into pea-sized pieces and coated with flour. The mixture should look crumbly, not pasty. If the butter starts to melt, stop immediately and chill the bowl for 10 minutes.
Step 3: Add Ice Water Gradually
With the mixer running on low, add ice water one tablespoon at a time. Mix just until the dough begins to clump together. You may not need all the water—stop as soon as the dough holds together when pressed. Overhydrating can lead to a tough crust.
Step 4: Form and Chill the Dough
Turn the dough out onto a lightly floured surface. Gently press it into a disk (for single crust) or two disks (for double crust). Wrap in plastic wrap and chill in the refrigerator for at least 1 hour. This resting period allows the gluten to relax and the butter to firm up, resulting in a flakier bake.
Common Mistakes and How to Avoid Them
Even with a stand mixer, it’s easy to make small errors that affect your pie crust. Here’s how to avoid the most common pitfalls.
Overmixing the Dough
One of the biggest mistakes is running the mixer too long after adding water. Overmixing develops gluten, which makes the crust tough instead of tender. Mix just until the dough comes together—some dry spots are okay. You can finish combining by hand if needed.
Using Warm Ingredients
Butter should be cold—just firm enough to hold its shape but not frozen solid. If your kitchen is warm, chill the bowl and paddle in the freezer for 10 minutes before starting. Ice water is essential—use water straight from the freezer or add ice cubes and let them melt slightly before measuring.
Skipping the Chill Time
Rushing to roll out the dough right after mixing is tempting, but chilling is non-negotiable. It firms up the butter, which creates steam pockets during baking—those are what give you flaky layers. Skipping this step often leads to a dense, greasy crust.
Adding Too Much Water
Humidity and flour brands affect how much water your dough needs. Start with 6 tablespoons and add more only if the dough won’t hold together. Too much water makes the dough sticky and hard to roll.
Tips for Perfect Pie Dough Every Time
Beyond the basics, these pro tips will elevate your pie-making game.
Use a Kitchen Scale
Measuring flour by volume can be inconsistent. A kitchen scale ensures accuracy—1 cup of all-purpose flour should weigh about 120–125 grams. This precision leads to more reliable results, especially in humid climates.
Try Vodka Instead of Water (Optional)
For an extra-tender crust, replace half the water with vodka. The alcohol evaporates during baking, leaving behind a flakier texture. It’s a trick used by many professional bakers and works beautifully in a stand mixer.
Roll Between Parchment Paper
After chilling, roll your dough between two sheets of parchment paper. This prevents sticking and makes it easier to transfer to your pie dish. Simply flip the dough over, remove the top paper, and invert it into the pan.
Blind Bake When Needed
For custard or cream pies, blind bake the crust first. Line the dough with parchment, fill with pie weights or dried beans, and bake at 375°F (190°C) for 15–20 minutes. Remove the weights and bake another 5–10 minutes until golden. This prevents a soggy bottom.
Storing and Freezing Pie Dough
One of the best things about making pie dough in a stand mixer is that you can prepare it ahead of time.
Refrigerator Storage
Wrapped tightly in plastic, pie dough keeps in the fridge for up to 3 days. Let it sit at room temperature for 10–15 minutes before rolling to prevent cracking.
Freezing for Later
For longer storage, freeze the dough disks for up to 3 months. Thaw in the refrigerator overnight before using. You can also freeze unbaked pie shells—just bake them straight from frozen, adding 5–10 minutes to the baking time.
Label and Date
Always label your dough with the date and type (e.g., “Sweet Pie Dough – 10/15”). This helps you keep track and ensures you use the oldest dough first.
Conclusion
Making pie dough in a stand mixer is not only possible—it’s often the smarter, faster, and more consistent choice. With the right technique, your mixer can produce tender, flaky crusts that rival those made by hand. Remember to use the paddle attachment, keep ingredients cold, mix just until combined, and always chill the dough before rolling. Whether you’re baking for a holiday feast or a quiet weekend treat, your stand mixer is a powerful ally in the kitchen.
If you’re new to using your stand mixer for baking, check out our Ultimate Guide of Stand Mixer In Kitchen for tips on maintenance, attachments, and recipe ideas. And if you’re ready to dive deeper into pie-making, explore our guides on lattice tops, crimping techniques, and seasonal fillings. Happy baking!
Frequently Asked Questions
Can I make pie dough in a stand mixer without overworking it?
Yes, as long as you use the paddle attachment and mix only until the dough comes together. Overmixing develops gluten, which leads to a tough crust—so stop as soon as it clumps.
What’s the best attachment for pie dough in a stand mixer?
The paddle (flat beater) attachment is ideal. It gently combines ingredients without aerating or kneading, which helps maintain a tender, flaky texture.
Should I chill the bowl before mixing pie dough?
Yes, especially in warm kitchens. Chilling the bowl and paddle for 10 minutes helps keep the butter cold, which is essential for flakiness.
Can I use the dough hook for pie dough?
No, the dough hook is designed for kneading bread dough and can overdevelop gluten in pie dough, resulting in a chewy crust. Stick with the paddle.
How much water should I add when making pie dough in a mixer?
Start with 6 tablespoons of ice water and add more one tablespoon at a time until the dough holds together. You may not need all 8 tablespoons.
Can I freeze pie dough made in a stand mixer?
Absolutely. Shape the dough into disks, wrap tightly in plastic, and freeze for up to 3 months. Thaw in the fridge before rolling and baking.
