

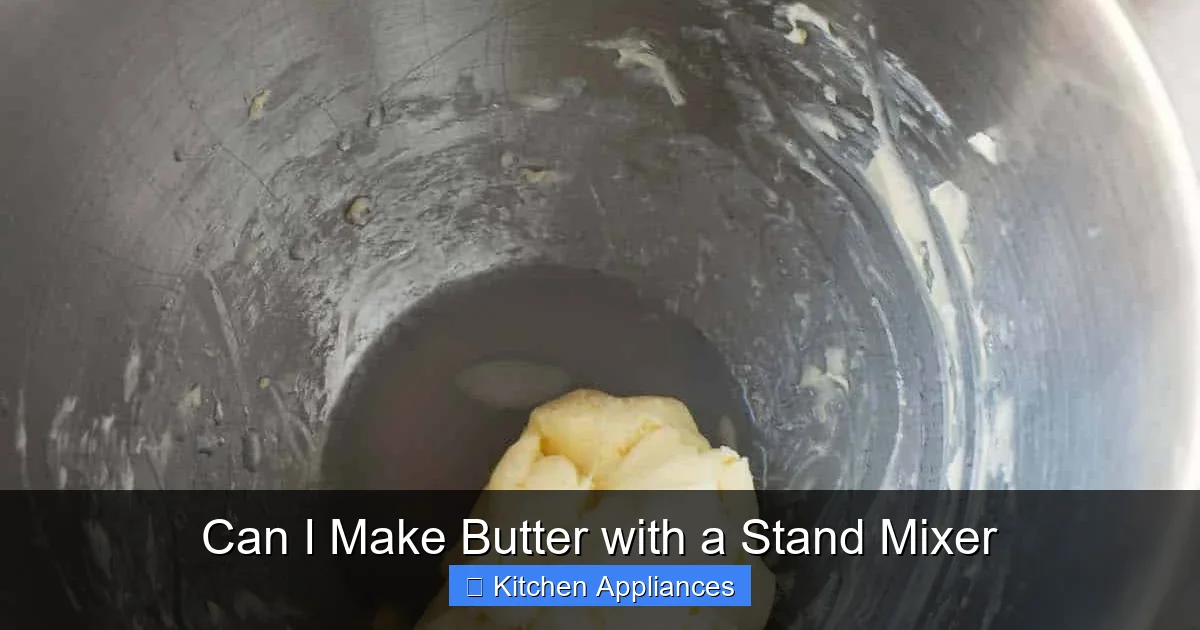
Absolutely—you can make butter with a stand mixer! It’s a simple, fun process that turns heavy cream into rich, homemade butter in under 20 minutes. With just one ingredient and your trusty mixer, you’ll enjoy fresher flavor and full control over texture and salt content.
Key Takeaways
- Yes, your stand mixer can make butter: The whisk attachment agitates cream until it separates into butter and buttermilk.
- Use cold, high-fat heavy cream: Look for cream with at least 36% fat for best results.
- Churning takes 10–15 minutes: Be patient—it starts as whipped cream, then breaks into butter grains.
- Rinse the butter well: Washing removes leftover buttermilk, which prevents spoilage.
- Save the buttermilk: Don’t toss it! Use it in pancakes, biscuits, or dressings.
- Customize your butter: Add herbs, garlic, honey, or sea salt after churning for flavored varieties.
- Clean-up is easy: Most stand mixer parts are dishwasher-safe, making post-butter cleanup a breeze.
📑 Table of Contents
Can I Make Butter with a Stand Mixer?
If you’ve ever stood over a jar of cream, shaking it vigorously until your arm ached—just hoping for butter—then you’ll love this: yes, you can make butter with a stand mixer. In fact, it’s one of the easiest and most rewarding kitchen projects you can tackle with this versatile appliance.
Making butter at home might sound old-fashioned, but it’s experiencing a modern revival. People are rediscovering the joy of crafting their own pantry staples, and butter is a perfect place to start. Not only does homemade butter taste richer and fresher than store-bought versions, but it also lets you control the ingredients—no preservatives, no mystery additives. And the best part? Your stand mixer does most of the work.
Whether you’re a seasoned baker or just love experimenting in the kitchen, turning cream into butter is a satisfying process that connects you to the basics of food preparation. Plus, it’s a great way to use your stand mixer beyond cookies and cakes. So, let’s dive into how it works, what you’ll need, and why your stand mixer is the perfect tool for the job.
Why Use a Stand Mixer to Make Butter?
Visual guide about Can I Make Butter with a Stand Mixer
Image source: eatmorebutter.com
You might be wondering: why not just shake a jar or use a food processor? While those methods work, a stand mixer offers consistency, power, and hands-free operation—three big advantages when making butter.
First, stand mixers are designed for prolonged mixing tasks. Unlike handheld mixers or manual shaking, they can run steadily for 10–15 minutes without overheating or tiring you out. The motor is built to handle thick mixtures, which is exactly what cream becomes as it transitions from liquid to whipped cream to butter.
Second, the whisk attachment is ideal for incorporating air and agitating the cream evenly. This consistent motion helps the fat molecules clump together more efficiently, speeding up the separation process. You’ll get better results with less effort.
Finally, using a stand mixer keeps your hands free. You can prep other ingredients, clean up, or simply relax while your machine does the churning. It’s a small luxury that makes the whole experience more enjoyable.
If you’re curious about all the ways your stand mixer can simplify kitchen tasks, check out our Ultimate Guide Of Stand Mixer In Kitchen for more inspiration.
What You’ll Need to Make Butter at Home
Making butter with a stand mixer requires just a few simple ingredients and tools. Here’s what to gather before you begin:
Ingredients
- Heavy cream (also called heavy whipping cream): Use at least 36% fat content. Cold cream works best—it helps the fat separate cleanly. Avoid ultra-pasteurized cream if possible, as it can be harder to churn.
- Optional: Salt: A pinch of fine sea salt enhances flavor. Add it after churning if you prefer unsalted butter.
Equipment
- Stand mixer: Any model with a whisk attachment will work—KitchenAid, Bosch, or similar.
- Whisk attachment: This is key. The wire loops help agitate the cream effectively.
- Large bowl or container: To catch splatters (optional but helpful).
- Cheesecloth or fine mesh strainer: For rinsing the butter.
- Cold water: For washing the butter.
Pro tip: Chill your mixing bowl and whisk attachment in the freezer for 10 minutes before starting. Cold tools help the cream stay cool, which improves butter formation.
Step-by-Step Guide to Making Butter with a Stand Mixer
Now for the fun part—turning cream into butter! Follow these steps for creamy, delicious results every time.
Step 1: Pour the Cream
Pour 2 cups (16 ounces) of cold heavy cream into the bowl of your stand mixer. Don’t overfill—leave at least 2 inches of space at the top to prevent splattering.
Step 2: Start Mixing on Medium Speed
Attach the whisk and begin mixing on medium speed (around setting 4–6 on most mixers). At first, the cream will look thin and bubbly. Keep going—this is normal.
Step 3: Watch for Stages
As you mix, you’ll notice clear stages:
- Whipped cream stage: After 3–5 minutes, the cream will thicken and hold soft peaks.
- Stiff peaks: Continue mixing, and the cream will become thicker and more glossy.
- Breaking point: Suddenly, the cream will look curdled. Liquid (buttermilk) will pool at the bottom, and yellow clumps (butter) will form. This is what you want!
Step 4: Stop and Scrape
Once the butter has separated, turn off the mixer. Scrape down the sides and bottom of the bowl to collect all the butter pieces.
Step 5: Rinse the Butter
Place the butter in a fine mesh strainer or wrap it in cheesecloth. Rinse under cold running water, pressing gently to remove excess buttermilk. This step is crucial—any leftover buttermilk can cause the butter to spoil quickly.
Step 6: Knead and Shape
Transfer the butter to a clean bowl. Use a spatula or your hands (lightly rinsed) to knead it gently, squeezing out more liquid. Shape it into a block, log, or roll it in parchment paper.
Step 7: Store or Flavor
Your butter is ready to use! Store it in an airtight container in the fridge for up to 2 weeks, or freeze for up to 3 months. For flavored butter, now’s the time to mix in herbs, garlic, honey, or spices.
Tips for Success and Common Mistakes to Avoid
Even simple recipes can go sideways if you’re not careful. Here are some tips to ensure your butter-making goes smoothly.
Use Cold Ingredients and Tools
Warm cream won’t churn properly. Keep everything cold—cream, bowl, and attachments. If your kitchen is warm, work quickly and consider placing the mixer bowl in a larger bowl of ice water during mixing.
Don’t Rush the Process
It’s tempting to crank up the speed, but medium is best. High speed can cause splattering and uneven churning. Patience pays off.
Don’t Skip the Rinse
Rinsing removes buttermilk, which contains bacteria that spoils butter. Skipping this step means your butter may only last a few days instead of weeks.
Save the Buttermilk
Don’t pour that liquid down the drain! Homemade buttermilk is perfect for baking. Try it in fluffy pancakes, tender biscuits, or creamy dressings. It adds a tangy depth that store-bought versions often lack.
Troubleshooting Tips
- Butter won’t form? Your cream might be too warm or not high enough in fat. Try again with colder, higher-fat cream.
- Too much liquid? Keep kneading and rinsing until the water runs clear.
- Butter tastes sour? You may have over-churned or didn’t rinse well. Start over with fresh cream.
Creative Ways to Use Your Homemade Butter
Once you’ve mastered basic butter, the fun really begins. Homemade butter is a blank canvas for creativity.
Flavored Butters
Mix in ingredients after churning:
- Honey butter: 1 tablespoon honey per ½ cup butter.
- Garlic herb butter: Minced garlic, parsley, thyme, and a pinch of salt.
- Lemon zest butter: Perfect for seafood or vegetables.
- Cinnamon sugar butter: Great on toast or pancakes.
Cooking and Baking
Use your butter in recipes where flavor matters—like sautéing vegetables, making sauces, or baking cookies. The rich, fresh taste makes a noticeable difference.
Gifts and Presentation
Shape butter into logs, press into molds, or roll into balls. Wrap in parchment and tie with twine for a charming homemade gift.
Conclusion
Making butter with a stand mixer is not only possible—it’s surprisingly easy and deeply satisfying. With just heavy cream and a few minutes of mixing, you can create rich, creamy butter that tastes better than anything from a store. Plus, you get the bonus of fresh buttermilk and the joy of crafting something delicious from scratch.
Your stand mixer is more than a baking tool—it’s a kitchen workhorse capable of so much more. From doughs to batters to homemade butter, it simplifies tasks and delivers consistent results. If you’re looking for more ways to maximize your mixer’s potential, don’t miss our guide on the Ultimate Guide Of Stand Mixer In Kitchen.
So next time you’re whipping cream for a dessert, why not go all the way? Let your stand mixer churn that cream into butter, and enjoy the fruits of your (minimal) labor. Your toast, your biscuits, and your taste buds will thank you.
Frequently Asked Questions
Can I make butter with any stand mixer?
Yes, as long as your stand mixer has a whisk attachment and a motor strong enough to handle thick mixtures, you can make butter. Most popular models like KitchenAid, Bosch, and Cuisinart work perfectly.
How long does it take to make butter in a stand mixer?
It typically takes 10 to 15 minutes of mixing on medium speed. The cream will go through stages—whipped cream, stiff peaks, then separation into butter and buttermilk.
Can I use pasteurized or ultra-pasteurized cream?
Pasteurized cream works best. Ultra-pasteurized cream can be harder to churn because the high heat treatment changes the protein structure, making separation less reliable.
How do I store homemade butter?
Store it in an airtight container in the refrigerator for up to 2 weeks. For longer storage, wrap it well and freeze for up to 3 months. Always rinse it well before storing to extend freshness.
What can I do with the leftover buttermilk?
Use it in baking! It’s great for pancakes, waffles, biscuits, and cakes. You can also use it in salad dressings or marinades for a tangy kick.
Can I make unsalted butter at home?
Absolutely. Simply skip the salt during the churning process. You can always add a pinch later if desired, or keep it pure and unsalted for baking.
