

Absolutely—you can make ice cream in a stand mixer! While it’s not a traditional ice cream maker, your stand mixer can churn delicious frozen desserts when paired with the right attachment or method. With a little prep and creativity, you’ll enjoy rich, creamy homemade ice cream without buying extra equipment.
If you’ve ever stared at your stand mixer and wondered, “Can I make ice cream in this thing?”—you’re not alone. Stand mixers like the iconic KitchenAid are kitchen workhorses, known for kneading dough, whipping meringues, and blending batters. But when summer hits and that craving for cold, creamy ice cream strikes, you might be surprised to learn that your trusty mixer can actually help you churn out homemade frozen treats—no standalone ice cream machine required.
The short answer? Yes, you absolutely can make ice cream in a stand mixer. But like any kitchen hack, it comes with a few caveats. You’ll need the right tools, a bit of planning, and an understanding of how freezing and churning work together. Whether you’re using a specialized ice cream maker attachment or a clever no-churn technique, your stand mixer can become your new favorite dessert-making sidekick.
In this guide, we’ll walk you through everything you need to know—from the equipment you’ll need to step-by-step methods, flavor ideas, and pro tips for success. So grab your mixer, chill your bowl, and let’s dive into the sweet, frozen world of stand mixer ice cream.
Key Takeaways
- Yes, it’s possible: You can make ice cream in a stand mixer using the ice cream maker attachment or a no-churn method.
- Requires freezing prep: The bowl or ingredients must be thoroughly frozen before mixing to achieve proper texture.
- Best with an attachment: A dedicated ice cream maker bowl (like KitchenAid’s) gives the creamiest results.
- No-churn works too: Whipped cream and sweetened condensed milk methods don’t need churning but still use the stand mixer.
- Timing matters: Mix in short bursts to avoid melting; transfer to a container and freeze for 4+ hours to set.
- Great for small batches: Ideal for 1–2 quarts—perfect for families or experimenting with flavors.
- Clean-up is easy: Most attachments are dishwasher-safe, making post-ice-cream cleanup a breeze.
📑 Table of Contents
How Does a Stand Mixer Make Ice Cream?
At first glance, a stand mixer doesn’t seem like the obvious choice for making ice cream. After all, traditional ice cream makers have built-in freezing systems and paddles designed specifically for churning. But stand mixers can replicate this process—with a little help.
The key lies in two things: freezing the mixing bowl and incorporating air while mixing. When you freeze the bowl (or use a pre-frozen attachment), it keeps the ice cream base cold during mixing. As the paddle churns the mixture, it introduces air—just like a commercial machine—preventing large ice crystals from forming and creating that smooth, creamy texture we all love.
There are two main ways to do this:
– Using a dedicated ice cream maker attachment (like KitchenAid’s Ice Cream Maker Bowl)
– Using a no-churn method that relies on whipped cream and condensed milk
Both methods use your stand mixer’s motor and paddle to blend and aerate, but the first gives you true churned ice cream, while the second creates a lighter, mousse-like frozen dessert. Either way, your mixer is doing the heavy lifting.
Using an Ice Cream Maker Attachment
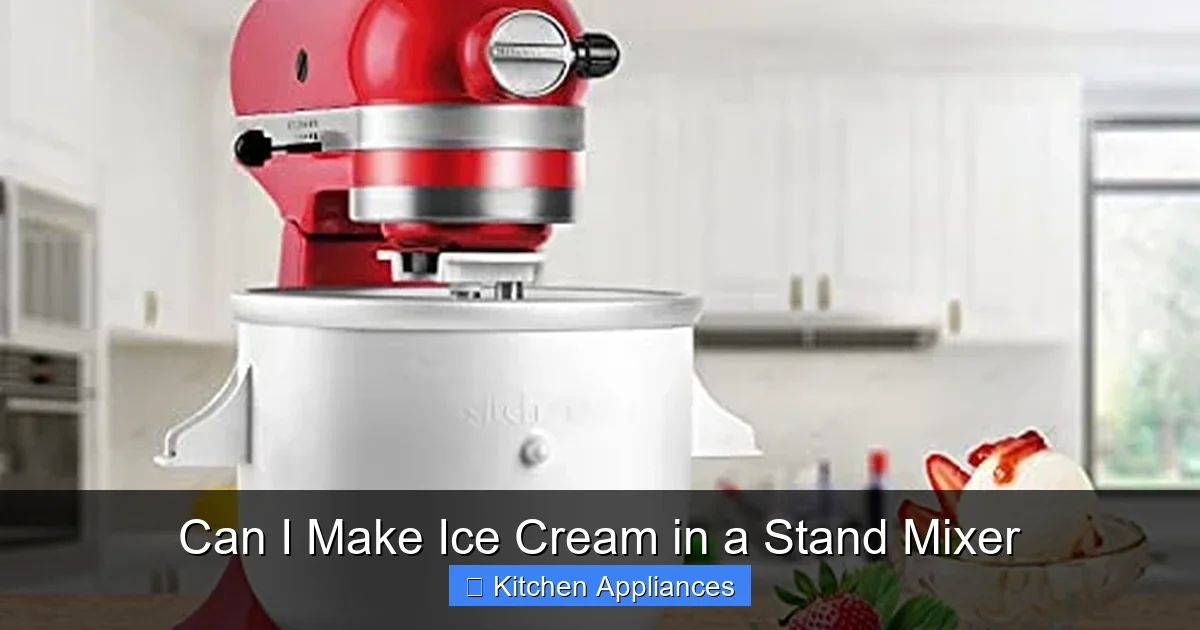
Visual guide about Can I Make Ice Cream in a Stand Mixer
Image source: images-na.ssl-images-amazon.com
If you’re serious about homemade ice cream, investing in an ice cream maker attachment is the way to go. These are specially designed bowls that fit onto your stand mixer and come with a built-in freezing system.
How It Works
The attachment typically includes a double-walled bowl filled with a freezing gel. You freeze the bowl for 15–24 hours before use. Once frozen, you attach it to your mixer, pour in your chilled ice cream base, and let the paddle churn while the bowl keeps everything cold.
Most models, like the KitchenAid Ice Cream Maker Attachment, can handle about 1.5 quarts of ice cream. The churning process takes 20–40 minutes, depending on your recipe and freezer temperature.
Step-by-Step Guide
1. Freeze the bowl: Place the attachment in the freezer for at least 15 hours (overnight is best).
2. Chill your base: Make your ice cream mixture (custard, cream, sugar, flavorings) and refrigerate it for 4+ hours or overnight.
3. Attach and churn: Secure the frozen bowl to your mixer, add the paddle, and pour in the base. Mix on low speed (Speed 2–4) for 20–30 minutes, or until thick and creamy.
4. Transfer and freeze: Scoop the soft-serve consistency ice cream into an airtight container and freeze for 4–6 hours to firm up.
Pro Tips for Best Results
– Don’t skip the chilling step—warm base = melted ice cream.
– Add mix-ins (chocolate chips, fruit, nuts) in the last 2 minutes of churning.
– Clean the bowl immediately after use—don’t let it thaw before washing.
No-Churn Ice Cream with Your Stand Mixer
Don’t have an ice cream maker attachment? No problem! You can still use your stand mixer to make delicious no-churn ice cream. This method relies on whipped cream and sweetened condensed milk to create a light, fluffy texture without any churning.
The Science Behind No-Churn
No-churn ice cream skips the custard base and uses whipped cream for volume and sweetness. The stand mixer whips the cream to stiff peaks, then you fold in condensed milk and flavorings. The result? A creamy, scoopable dessert that freezes beautifully.
Basic No-Churn Recipe
- 2 cups heavy whipping cream
- 1 (14 oz) can sweetened condensed milk
- 1 tsp vanilla extract (or other flavorings)
Instructions
1. Chill your mixing bowl and whisk attachment in the freezer for 15 minutes.
2. Whip the cream on medium-high until stiff peaks form (about 3–5 minutes).
3. Gently fold in the condensed milk and vanilla using the paddle on low speed or by hand.
4. Pour into a loaf pan or container, cover, and freeze for 6+ hours.
Flavor Variations
– Strawberry: Fold in 1 cup mashed fresh strawberries.
– Mint Chocolate Chip: Add 1 tsp mint extract and ½ cup mini chocolate chips.
– Salted Caramel: Swirl in ½ cup caramel sauce before freezing.
This method is perfect for beginners and requires no special equipment—just your stand mixer and a freezer.
Tips for Perfect Stand Mixer Ice Cream
Whether you’re using an attachment or the no-churn method, these tips will help you avoid common pitfalls and achieve creamy, dreamy results every time.
Chill Everything
Cold ingredients and tools are non-negotiable. Chill your bowl, whisk, and even your spatula. A warm bowl will melt your cream base before it has a chance to set.
Don’t Overmix
Once your ice cream reaches soft-serve consistency, stop mixing. Over-churning can cause it to become grainy or buttery.
Use Fresh, Quality Ingredients
Since there’s no pasteurization step in home recipes, use fresh cream, eggs (if making custard), and high-quality flavorings.
Store Properly
Transfer your ice cream to an airtight container with a piece of parchment paper on top to prevent ice crystals. It’ll keep for up to 2 weeks.
Experiment with Flavors
Your stand mixer makes it easy to test new combinations. Try coffee, matcha, or even brownie batter swirls.
Common Mistakes to Avoid
Even with the best intentions, things can go wrong. Here are the most common mistakes—and how to fix them.
Ice Cream Is Too Hard
This usually means it was over-frozen or the base was too watery. Try adding a tablespoon of vodka or corn syrup next time—it lowers the freezing point and keeps it softer.
Grainy or Icy Texture
Caused by large ice crystals. Prevent this by chilling your base thoroughly and using a high-fat cream (36% fat or more).
Won’t Churn Properly
If your mixture isn’t thickening, your bowl may not have been cold enough. Always freeze the attachment for the full recommended time.
Leaking or Melting
Don’t leave the mixer running too long. Churn in 5-minute intervals if needed, and keep the bowl in the freezer between mixes.
Why Use a Stand Mixer for Ice Cream?
You might be wondering—why bother when you could just buy a dedicated ice cream maker? Here’s why your stand mixer is a smart choice:
– Space-saving: One appliance, multiple uses. No need to store another gadget.
– Cost-effective: Attachments are cheaper than full ice cream machines.
– Versatile: You’re already using it for baking—why not desserts too?
– Great for small batches: Perfect for families or trying new flavors without waste.
Plus, if you already own a stand mixer, you’re halfway there. For a deeper dive into how stand mixers can transform your kitchen, check out our Ultimate Guide Of Stand Mixer In Kitchen.
Final Thoughts
So, can you make ice cream in a stand mixer? The answer is a resounding yes. Whether you’re using a specialized attachment or a no-churn hack, your mixer can deliver rich, creamy, homemade ice cream with minimal effort.
It’s a fun, flexible way to enjoy frozen desserts without investing in extra equipment. Plus, it’s a great way to get creative—try new flavors, involve the kids, and impress guests with your kitchen skills.
Just remember: chill your tools, follow the steps, and don’t rush the freeze. With a little practice, you’ll be churning out ice cream like a pro—all thanks to your trusty stand mixer.
Frequently Asked Questions
Can I make ice cream in a KitchenAid mixer without an attachment?
Yes! You can use the no-churn method by whipping cream and folding in sweetened condensed milk. It won’t be churned, but it’ll still be creamy and delicious.
How long does it take to make ice cream in a stand mixer?
With an attachment, churning takes 20–40 minutes, plus 4–6 hours to freeze. No-churn versions take 10 minutes to mix and 6+ hours to freeze.
Do I need to freeze the bowl every time?
Yes—if using an ice cream maker attachment, the bowl must be frozen for 15–24 hours before each use.
Can I use a hand mixer instead?
You can make no-churn ice cream with a hand mixer, but it won’t churn traditional ice cream. A stand mixer is better for consistent results.
Why is my ice cream icy?
This usually happens when the base isn’t chilled enough or the bowl wasn’t frozen properly. Always prep your tools and ingredients in advance.
Can I add alcohol to my ice cream?
Yes—adding a tablespoon of vodka or liqueur prevents freezing too hard and adds flavor. Just don’t overdo it, or it won’t set.
