

Yes, you absolutely can make sourdough in a stand mixer—and it’s easier than you think. Using a stand mixer saves time, reduces hand fatigue, and ensures consistent dough development, especially for beginners or those baking frequently.
If you’ve ever stood over a bowl, arms aching from kneading sticky sourdough dough, you’re not alone. Sourdough baking is deeply rewarding—but it can also be physically demanding. That’s why so many home bakers are turning to their trusty stand mixers for help. The big question on everyone’s mind: *Can I make sourdough in a stand mixer?* The short answer is a resounding yes. Not only can you use a stand mixer for sourdough, but it can actually improve your results—especially if you’re baking regularly or working with high-hydration doughs.
Stand mixers take the heavy lifting out of bread-making. They mix ingredients evenly, develop gluten efficiently, and free up your hands for other tasks. Whether you’re a beginner or a seasoned sourdough enthusiast, using a stand mixer can make the process faster, more consistent, and far less messy. But like any tool, it works best when used correctly. In this guide, we’ll walk you through everything you need to know about making sourdough in a stand mixer—from setup to shaping—so you can bake with confidence and ease.
Key Takeaways
- Stand mixers simplify sourdough mixing: They evenly incorporate ingredients and develop gluten faster than hand mixing.
- Use the dough hook attachment: This is essential for proper gluten development without overworking the dough.
- Adjust mixing time for sourdough: Sourdough benefits from slower, gentler mixing to preserve the starter’s activity.
- Monitor dough temperature: Stand mixers can warm dough; keep ingredients cool and watch for ideal 75–78°F dough temp.
- Proofing can also happen in the mixer bowl: Use the bowl as a covered proofing vessel to save space and maintain humidity.
- Not all mixers are equal: Ensure your model has a strong motor and low-speed settings for best results.
- Hand finishing may still be needed: Some folds or shaping steps are better done by hand for optimal structure.
📑 Table of Contents
Why Use a Stand Mixer for Sourdough?
Sourdough is known for its long fermentation process and delicate balance of wild yeast and bacteria. But that doesn’t mean the mixing stage has to be a workout. A stand mixer offers several advantages over hand mixing:
First, it ensures thorough and uniform hydration. Sourdough doughs, especially those with 70% or higher hydration, can be tricky to mix by hand without leaving dry pockets. The paddle and dough hook attachments in a stand mixer reach every corner of the bowl, creating a smooth, cohesive dough from the start.
Second, it saves time and energy. Kneading by hand can take 10–15 minutes of continuous effort. With a stand mixer, you can achieve similar gluten development in just 5–8 minutes. This is especially helpful if you’re baking multiple loaves or managing a busy kitchen.
Finally, consistency is key in sourdough. Small variations in kneading can affect fermentation and final texture. A stand mixer delivers repeatable results, helping you refine your technique and troubleshoot issues more effectively.
Choosing the Right Stand Mixer and Attachments

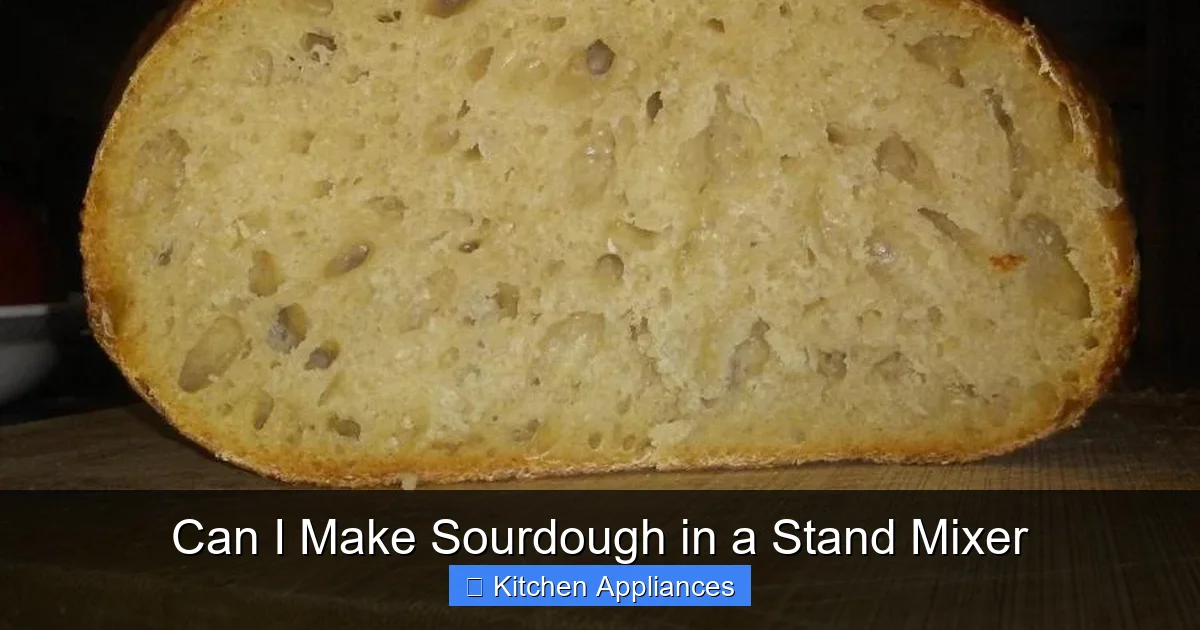
Visual guide about Can I Make Sourdough in a Stand Mixer
Image source: sourdough.com
Not all stand mixers are created equal—especially when it comes to handling dense, sticky sourdough dough. Before you start, make sure your mixer is up to the task.
Motor Power Matters
Look for a mixer with at least 300 watts of power. Sourdough dough, particularly high-hydration versions, can be tough on motors. Cheaper or older models may struggle, overheat, or even burn out. Brands like KitchenAid, Bosch, and Ankarsrum are known for their durability and performance with heavy doughs.
Use the Dough Hook Attachment
The dough hook is your best friend for sourdough. Unlike the flat beater or wire whip, the dough hook mimics hand kneading by gently stretching and folding the dough. It’s designed to work with stiff and sticky mixtures, making it ideal for sourdough.
Avoid using the paddle attachment for final kneading—it can tear the dough and doesn’t develop gluten as effectively. Use the paddle only for the initial mix to combine flour, water, and starter.
Check for Low-Speed Settings
Sourdough benefits from slow, gentle mixing. High speeds can overheat the dough and damage the delicate gluten network. Make sure your mixer has a low-speed setting (usually labeled “stir” or “2”) for the first few minutes of mixing, then gradually increase to medium-low for kneading.
For a deeper dive into choosing the right mixer for your kitchen, check out our Ultimate Guide of Stand Mixer in Kitchen.
Step-by-Step: Mixing Sourdough in a Stand Mixer
Now that you’ve got the right tools, let’s walk through the process of making sourdough using your stand mixer.
1. Mix the Dough
Start by combining your active sourdough starter, water, and flour in the mixer bowl. Use the paddle attachment on low speed (setting 2) for about 2–3 minutes, just until no dry flour remains. This is called the autolyse stage, and it helps hydrate the flour evenly before adding salt.
2. Add Salt and Continue Mixing
Once the dough comes together, add the salt. Switch to the dough hook and mix on low speed for 2 minutes, then increase to medium-low (setting 4) for another 5–7 minutes. You’re looking for the dough to become smooth, elastic, and slightly tacky but not sticky.
Pro tip: Scrape down the sides of the bowl halfway through to ensure even mixing.
3. Check Dough Development
To test if the dough is ready, perform the windowpane test. Grab a small piece of dough and gently stretch it between your fingers. If it stretches thin enough to let light through without tearing, gluten development is sufficient.
If it tears easily, mix for another 1–2 minutes and test again.
Managing Dough Temperature and Fermentation
One common concern with using a stand mixer is dough temperature. Friction from mixing can raise the dough’s temperature, which may speed up fermentation too much—especially in warm kitchens.
Keep Ingredients Cool
Use cool or room-temperature water (around 70°F) and store your flour in a cool place. If your kitchen is warm, consider chilling the mixing bowl for 10–15 minutes before starting.
Monitor Dough Temp
Aim for a final dough temperature of 75–78°F. Use a digital thermometer to check after mixing. If it’s too warm, place the dough in the fridge for 10–15 minutes before beginning bulk fermentation.
Bulk Fermentation in the Mixer Bowl
Here’s a bonus tip: You can use the mixer bowl for bulk fermentation. Simply cover it with a damp towel or plastic wrap and let it rise at room temperature. The bowl’s shape helps contain the dough and maintain humidity, reducing the need for extra containers.
Just remember to transfer the dough to a proofing basket or banneton for the final rise before baking.
When to Switch Back to Hands
While the stand mixer handles the heavy lifting, some steps are still best done by hand.
Stretch and Folds
During bulk fermentation, most sourdough recipes call for a series of stretch and folds—gentle manipulations that strengthen the dough. These are difficult to do in the mixer and are more effective when done by hand in a bowl.
Set a timer for every 30 minutes and perform 4–6 sets of stretch and folds over 2–3 hours.
Shaping the Loaf
Shaping requires tactile feedback. You need to feel the tension in the dough to create a tight, round boule or oval batard. The stand mixer can’t replicate this, so save shaping for your hands.
Lightly flour your work surface and use a bench scraper to help handle the sticky dough.
Tips for Success and Common Mistakes to Avoid
Even with a stand mixer, sourdough can be finicky. Here are some practical tips to ensure great results every time.
Don’t Overmix
Overmixing can lead to a slack, weak dough that doesn’t hold its shape. Stick to the recommended mixing times and rely on the windowpane test rather than a timer.
Adjust Hydration Based on Your Mixer
Some mixers handle high-hydration doughs better than others. If your dough is too sticky and climbs the hook, reduce hydration by 5% next time. Conversely, if it’s too stiff, increase slightly.
Clean Your Mixer Thoroughly
Sourdough starter and dough can leave residue that hardens over time. Wash the bowl, hook, and paddle immediately after use to prevent buildup and maintain performance.
Use a Timer
It’s easy to get distracted while the mixer runs. Set a timer for each mixing stage to avoid overworking the dough.
Conclusion
So, can you make sourdough in a stand mixer? Absolutely—and you should! A stand mixer is a powerful ally in sourdough baking, offering consistency, efficiency, and ease. From mixing and kneading to proofing, it streamlines the process without sacrificing quality. Just remember to use the right attachment, monitor dough temperature, and finish key steps by hand for the best results.
Whether you’re baking your first loaf or your hundredth, incorporating a stand mixer into your sourdough routine can make the journey more enjoyable and your bread more reliable. With the right technique and a little practice, you’ll be pulling golden, crackly sourdough loaves from your oven with confidence.
Frequently Asked Questions
Can I use a hand mixer instead of a stand mixer for sourdough?
It’s not recommended. Hand mixers lack the power and stability needed for thick sourdough dough and can overheat quickly. A stand mixer with a dough hook is far better suited for the job.
Will using a stand mixer affect my sourdough starter?
No, as long as you mix gently and avoid overheating the dough. The starter’s activity depends more on temperature and fermentation time than mixing method.
Can I mix and proof sourdough entirely in the stand mixer bowl?
Yes! Many bakers use the mixer bowl for both mixing and bulk fermentation. Just cover it well and transfer to a proofing basket for the final rise.
How long should I mix sourdough in a stand mixer?
Start with 2–3 minutes on low to combine, then 5–7 minutes on medium-low with the dough hook. Always check with the windowpane test to avoid overmixing.
What if my dough is too sticky in the mixer?
Add a small amount of flour (1–2 tablespoons) during mixing, or reduce hydration in your next bake. High-hydration doughs can be challenging for some mixers.
Can I use a stand mixer for no-knead sourdough?
Yes, but it’s unnecessary. No-knead recipes rely on long fermentation for gluten development, so mixing by hand or with a spatula is usually sufficient.
