


If you’re craving a decadent, melt-in-your-mouth dessert, this tasty brownies recipe delivers fudgy perfection with minimal effort. Made with simple ingredients and a few smart techniques, these brownies are ideal for beginners and seasoned bakers alike.
Key Takeaways
- Use high-quality chocolate: Real chocolate (not cocoa powder alone) ensures a rich, deep flavor and smooth texture.
- Melt butter and chocolate together: This creates a glossy, dense batter that leads to fudgy brownies.
- Don’t overmix the batter: Stir just until combined to avoid tough, cakey results.
- Bake until just set: Slightly underbaking ensures a gooey center—look for a shiny crust with a soft interior.
- Let them cool completely: This allows the texture to set and makes slicing clean, neat squares easier.
- Add mix-ins wisely: Chocolate chips, nuts, or sea salt can elevate flavor without compromising texture.
- Store properly: Keep in an airtight container at room temperature for up to 5 days or freeze for longer storage.
Quick Answers to Common Questions
What makes brownies fudgy instead of cakey?
Fudgy brownies have more fat (butter and chocolate) and less flour than cakey ones. Melting chocolate and butter together and not overmixing the batter also helps achieve that dense, gooey texture.
Can I use cocoa powder instead of chocolate bars?
Yes, but the texture won’t be as rich. Use ¾ cup cocoa powder and increase the butter to 1 ¼ cups. The flavor will be lighter, so add 1 teaspoon of instant coffee to deepen it.
How do I know when my brownies are done baking?
The edges should be set, the top dry and crackly, and a toothpick inserted in the center should come out with a few moist crumbs—not wet batter.
Can I make these brownies gluten-free?
Absolutely! Swap the all-purpose flour for a 1:1 gluten-free baking blend. The texture will be nearly identical.
Why do my brownies sink in the middle?
This usually happens from underbaking or opening the oven too early. Make sure your oven is fully preheated and avoid peeking during the first 20 minutes of baking.
📑 Table of Contents
Why This Tasty Brownies Recipe Stands Out
If you’ve ever bitten into a brownie only to find it dry, cakey, or bland, you’re not alone. Many recipes promise fudgy perfection but fall short. That’s why this tasty brownies recipe is a game-changer. It’s designed to deliver rich, dense, and deeply chocolatey brownies with a crackly top and a soft, almost molten center—exactly what a true brownie lover craves.
What makes this recipe special isn’t just the ingredients—it’s the method. By melting chocolate and butter together, we create a silky base that locks in moisture. We use a balanced ratio of sugar, flour, and eggs to ensure structure without sacrificing that gooey texture. Plus, it’s simple enough for a weeknight treat but impressive enough to serve at a dinner party. Whether you’re a baking newbie or a seasoned pro, this recipe will become your go-to for satisfying chocolate cravings.
Ingredients You’ll Need for Fudgy Brownies
This recipe uses pantry staples and high-quality chocolate for maximum flavor. Here’s what you’ll need to make 16 rich, fudgy brownies:
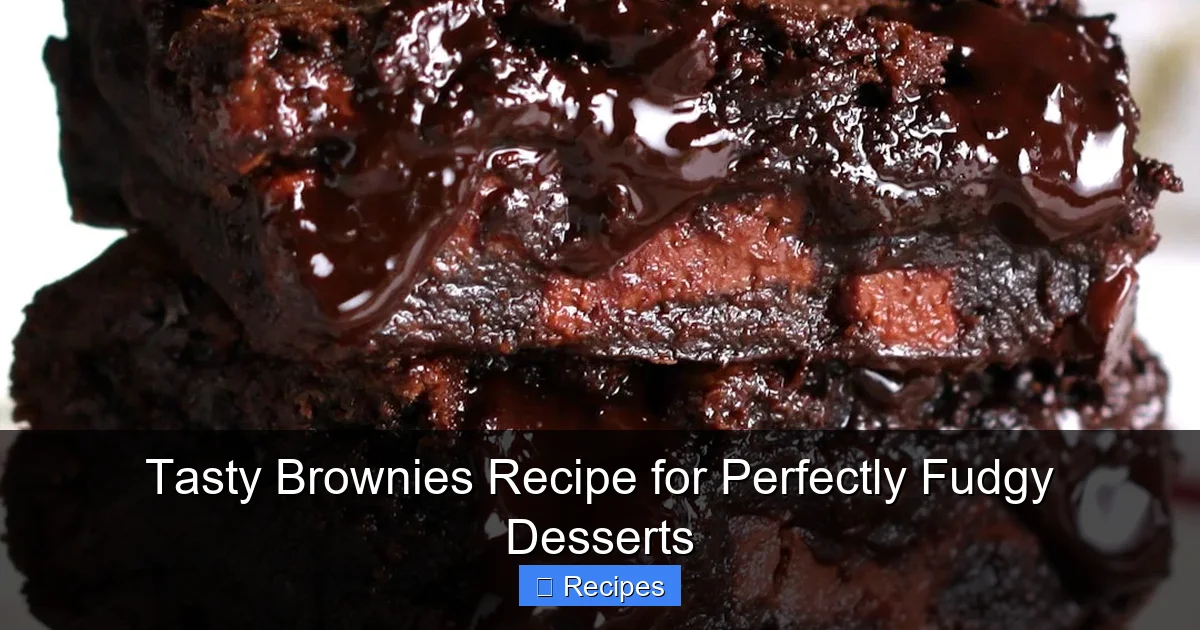
Visual guide about Tasty Brownies Recipe for Perfectly Fudgy Desserts
Image source: img.buzzfeed.com
- 1 cup (225g) unsalted butter: Use room-temperature butter for even melting.
- 8 ounces (225g) semi-sweet or dark chocolate: Chopped bars work better than chips—they melt smoother.
- 1 ¼ cups (250g) granulated sugar: Adds sweetness and helps create that shiny crust.
- ½ cup (100g) brown sugar: Adds moisture and a hint of caramel flavor.
- 3 large eggs: Room temperature for better incorporation.
- 1 teaspoon vanilla extract: Enhances the chocolate flavor.
- ¾ cup (95g) all-purpose flour: Just enough to hold the structure.
- ¼ cup (25g) cocoa powder: Use natural, unsweetened cocoa for depth.
- ½ teaspoon salt: Balances the sweetness and boosts flavor.
- Optional mix-ins: ½ cup chocolate chips, chopped walnuts, or a sprinkle of sea salt on top.
Choosing the Right Chocolate
Not all chocolate is created equal. For the best results, use real chocolate bars (like Ghirardelli or Lindt) instead of chocolate chips. Chips contain stabilizers that prevent melting, which can lead to a grainy texture. Semi-sweet or dark chocolate (60–70% cacao) gives the perfect balance of sweetness and richness. If you prefer a sweeter brownie, milk chocolate works too—just reduce the granulated sugar by 2 tablespoons.
Room Temperature Matters
Bring your eggs to room temperature before starting. Cold eggs can cause the melted chocolate mixture to seize, creating lumps. Simply leave them out for 30 minutes or place them in a bowl of warm water for 5–10 minutes. This small step ensures a smooth, velvety batter.
Step-by-Step Instructions for Perfect Brownies
Follow these simple steps for brownies that are fudgy, flavorful, and foolproof. The entire process takes about 15 minutes of prep and 25–30 minutes of baking.
Step 1: Preheat and Prepare
Preheat your oven to 350°F (175°C). Line an 8×8-inch baking pan with parchment paper, leaving an overhang on two sides. This makes it easy to lift the brownies out later for clean slicing. Lightly grease the parchment or spray with non-stick cooking spray to prevent sticking.
Step 2: Melt Butter and Chocolate
In a medium saucepan over low heat, melt the butter and chopped chocolate together. Stir constantly until smooth and glossy. Remove from heat and let cool for 5 minutes. This prevents the eggs from cooking when added.
Step 3: Mix in Sugars and Eggs
Whisk in the granulated sugar and brown sugar until combined. Add the eggs one at a time, whisking well after each. Stir in the vanilla extract. The mixture should look thick and shiny.
Step 4: Add Dry Ingredients
Sift in the flour, cocoa powder, and salt. Use a spatula to gently fold the dry ingredients into the wet mixture. Stir just until no flour streaks remain—overmixing leads to tough brownies. If using mix-ins like chocolate chips or nuts, fold them in now.
Step 5: Bake to Perfection
Pour the batter into the prepared pan and spread evenly. Bake for 25–30 minutes. The brownies are done when the edges are set, the top looks dry and crackly, and a toothpick inserted into the center comes out with a few moist crumbs (not wet batter). Avoid overbaking—this is key to fudgy texture.
Step 6: Cool and Slice
Let the brownies cool completely in the pan on a wire rack—this can take 1–2 hours. Cooling allows the center to set and makes slicing clean, neat squares much easier. Once cooled, lift them out using the parchment overhang and cut into 16 pieces.
Tips for Achieving the Best Texture
Texture is everything when it comes to brownies. Here’s how to ensure yours are perfectly fudgy every time:
Don’t Overbake
One of the biggest mistakes is baking brownies too long. They continue to cook slightly after being removed from the oven due to residual heat. Pull them out when the center still jiggles slightly. A toothpick should have a few moist crumbs—not come out clean.
Use the Right Pan
An 8×8-inch metal or glass pan works best. Dark pans can cause overbrowning, so if using one, reduce the oven temperature by 25°F. Avoid larger pans—they’ll result in thin, dry brownies.
Fold, Don’t Stir Vigorously
When combining wet and dry ingredients, use a folding motion with a spatula. This prevents developing too much gluten, which leads to a cakey texture. Aim for a dense, moist crumb.
Add a Pinch of Espresso Powder (Optional)
For an extra chocolate boost, add 1 teaspoon of instant espresso powder to the dry ingredients. It enhances the chocolate flavor without tasting like coffee.
Serving and Storing Your Brownies
These brownies are delicious on their own, but they’re even better with a few simple upgrades. Serve warm with a scoop of vanilla ice cream and a drizzle of caramel sauce for a decadent dessert. Or dust with powdered sugar for a classic touch.
Storage Tips
Store cooled brownies in an airtight container at room temperature for up to 5 days. For longer storage, wrap individual pieces in plastic wrap and freeze for up to 3 months. Thaw at room temperature before serving.
Reheating for Fresh-Baked Taste
To revive slightly stale brownies, microwave for 10–15 seconds or warm in a 300°F oven for 5 minutes. This brings back that fresh-baked gooeyness.
Variations to Try
Once you’ve mastered the base recipe, feel free to get creative. Here are a few tasty twists:
- Peanut Butter Swirl: Mix ¼ cup peanut butter with 1 tablespoon powdered sugar and swirl into the batter before baking.
- Mint Chocolate: Add ½ teaspoon peppermint extract and fold in chopped mint chocolate chips.
- Salted Caramel: Drizzle caramel sauce over the batter and sprinkle with flaky sea salt before baking.
- Blondies: Omit the chocolate and cocoa powder. Use 1 cup brown sugar and 1 teaspoon vanilla for a buttery, caramel-like treat.
Why This Recipe Is a Crowd-Pleaser
These brownies are more than just a dessert—they’re an experience. The rich aroma of melting chocolate, the crackly top that gives way to a soft center, and the deep, satisfying flavor make them a favorite at birthdays, potlucks, and holiday gatherings. Plus, they’re easy enough to whip up on a whim.
Whether you’re baking for a special occasion or just treating yourself after a long day, this tasty brownies recipe delivers consistent, restaurant-quality results. With simple ingredients and foolproof steps, you’ll never need another brownie recipe again.
Frequently Asked Questions
Can I freeze these brownies?
Yes! Wrap individual pieces in plastic wrap and place in a freezer-safe bag. They’ll keep for up to 3 months. Thaw at room temperature before serving.
What’s the best way to cut brownies neatly?
Let them cool completely, then use a sharp knife dipped in hot water and wiped dry between cuts. This gives clean, professional-looking slices.
Can I substitute oil for butter?
You can, but butter adds flavor and helps create the crackly top. If using oil, choose a neutral one like canola and reduce the amount by 1–2 tablespoons.
Why do my brownies have a shiny crust?
That’s normal! The shiny, crackly top comes from the sugar dissolving in the melted chocolate mixture. It’s a sign of a well-made fudgy brownie.
Can I add nuts or dried fruit?
Yes! Walnuts, pecans, or dried cherries work well. Toast nuts first for extra flavor and fold them in gently to avoid sinking.
How long do these brownies stay fresh?
Stored in an airtight container at room temperature, they stay fresh for up to 5 days. For best texture, enjoy within 2–3 days.
